

Troubleshooting Tips for Resolving Signal Interference and Dead Zones in Home Wireless Internet
Having a strong and reliable wireless internet connection is essential in today’s connected world. However, signal interference and dead zones can disrupt your Wi-Fi network, causing frustration and hindering your online activities. In this article, we will explore effective troubleshooting tips to address signal interference and dead zones in your home wireless internet setup.
Understanding Signal Interference and Dead Zones
Signal Interference occurs when other electronic devices, neighboring Wi-Fi networks, physical obstacles, or even environmental factors disrupt the wireless signal between your router and devices. This interference can result in slow speeds, dropped connections, or intermittent connectivity issues.
Dead Zones are areas within your home where the Wi-Fi signal is weak or nonexistent, leading to poor or no internet connectivity. Dead zones are often caused by obstructions like walls, large furniture, or the distance between your router and devices.
Troubleshooting Tips to Address Signal Interference and Dead Zones
1. Optimize Router Placement
- Central Location: Place your router in a central location within your home to ensure even distribution of the Wi-Fi signal.
- Elevated Position: Position the router at an elevated location, such as a shelf or wall mount, to improve signal coverage.
- Avoid Interference: Keep the router away from electronic devices, metal objects, and thick walls that can block or weaken the signal.
2. Update Router Firmware
- Check for firmware updates for your router and ensure it is running the latest version. Updated firmware can improve performance and address known issues that may cause signal interference.
3. Use Wireless Range Extenders or Mesh Wi-Fi Systems
- Range Extenders: Install wireless range extenders in areas with weak signal coverage to boost the Wi-Fi signal and eliminate dead zones.
- Mesh Wi-Fi Systems: Consider investing in a mesh Wi-Fi system that uses multiple access points to create a seamless

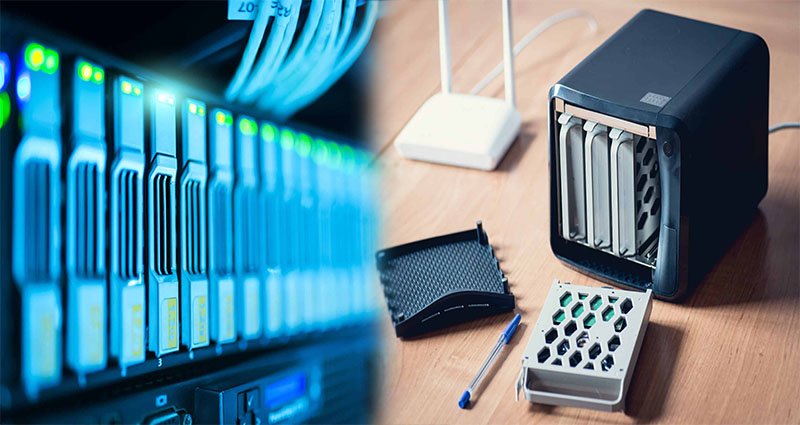
Scalable Storage Options to Accommodate Growing Needs in Wireless NAS for Home
As our digital lives expand, so does our need for ample storage space. Home networks are now filled with an array of devices, from smartphones to smart TVs, all requiring storage for videos, photos, documents, and more. Network-Attached Storage (NAS) provides a convenient and efficient solution for centralized storage in a home network. In this article, we explore scalable storage options to accommodate the growing needs of a wireless NAS for home.
Understanding Wireless NAS
A Wireless NAS device is a dedicated storage solution that connects to your home network, allowing multiple devices to access and share files and media. With wireless capabilities, NAS eliminates the need for physical connections, providing convenience and flexibility. As your storage requirements evolve, the ability to expand the NAS storage capacity becomes crucial.
The Importance of Scalable Storage
Scalable storage refers to the ability to expand the storage capacity of a NAS device as your needs grow. This scalability allows you to start with a smaller capacity and gradually increase it, saving costs in the initial stages. By choosing a NAS device with scalable storage options, you future-proof your storage solution and ensure that it can adapt to the changing demands of your home network.
Different Scalable Storage Options
There are several scalable storage options available for wireless NAS devices. Let’s explore some of the most popular ones:
1. Hard Drive Bays
Many NAS devices come with multiple drive bays that can accommodate multiple hard drives. This allows you to start with a single drive and later add more drives as needed, increasing your overall storage capacity. Some NAS devices even support hot-swapping, where you can add or replace drives without powering down the device.
2. Expansion Units
Expansion units provide an external solution for increasing the storage capacity of your NAS device. These … Read More
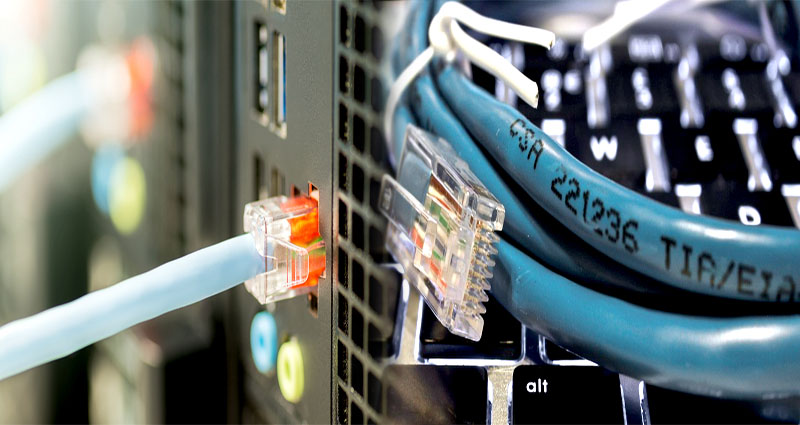
Installing Ethernet Cables and Switches for Reliable Connections in a Wired Home Network
In our technologically advanced world, a strong and robust home network has become a necessity. With the increasing number of devices connected to the internet, a reliable and stable network connection has never been more important. While Wi-Fi has its advantages, a wired home network provides unparalleled speed, security, and stability. This article will guide you through the process of installing Ethernet cables and switches to ensure a reliable connection in your wired home network.
Why Choose Ethernet Cables and Switches?
Ethernet cables are the foundation of any wired network. They transmit data at high speeds and offer a stable connection, making them ideal for demanding applications such as online gaming, media streaming, or file transfers. When combined with switches, Ethernet cables enable multiple devices to connect within the network, eliminating the need for individual wireless connections.
Equipment Needed
Before diving into the installation process, gather the necessary equipment:
- Ethernet cables: Choose Category 6 (CAT6) or higher cables for optimal performance. Measure the required length based on the distance between your devices and the central switch location.
- Ethernet switches: Select a switch with enough ports to accommodate all your devices, with an additional few for future expansions.
- Crimping tool and connectors: These tools are essential for customizing cable lengths and attaching connectors.
- Drill and screws: If you need to mount the switch on a wall or any other surface.
With the equipment ready, let’s move onto the installation process.
Step-by-Step Installation Guide
- Plan the network layout: Analyze the locations of your devices and determine the optimal routing for the Ethernet cables. Consider the length required and any potential obstacles such as walls or furniture.
- Prepare the cables: Measure and cut the Ethernet cables to the desired lengths, leaving a little extra room for flexibility.
Automated Backup and Data Redundancy Features with NAS Storage for Home
As digital data continues to grow in importance, ensuring its safety and accessibility becomes a top priority for individuals and households. Network Attached Storage (NAS) devices have become a popular solution for secure and reliable data storage at home. NAS systems not only provide ample storage capacity but also offer automated backup and data redundancy features, providing peace of mind and protection against data loss.
Understanding NAS Storage
NAS storage refers to a dedicated device or server that provides data storage and file-sharing capabilities over a network. These devices are designed to be easily accessible by multiple users and allow for centralized storage, making them an ideal solution for homes with multiple devices and users. NAS systems can be customized with various features, including automated backup and data redundancy, to ensure the integrity and availability of data.
Automated Backup
Automated backup is a crucial feature offered by NAS systems, allowing users to schedule regular backups of their important data. Instead of relying on manual backups that are prone to human error or forgetfulness, automated backup simplifies the process by automatically copying and storing data from selected devices or folders according to a predefined schedule.
With NAS devices, users can set up incremental or differential backups, which only copy the changes made since the last backup. This saves storage space and reduces backup time, making the process efficient and less resource-intensive.
Data Redundancy
Data redundancy is another essential feature that NAS systems offer. Redundancy refers to the duplication of data across multiple drives within the NAS device, ensuring that there are multiple copies of data available in case of drive failure. By employing data redundancy techniques such as RAID (Redundant Array of Independent Disks), NAS devices provide protection against data loss due to hardware failures.
RAID configurations, depending on the level … Read More

Power-Saving Features for Eco-Friendly Operation in Energy-Efficient NAS for Home
As concern for the environment continues to grow, more and more individuals are looking for ways to reduce their carbon footprint and adopt eco-friendly practices. One area where energy conservation can be achieved is in the use of Network Attached Storage (NAS) systems for home. Energy-efficient NAS devices not only offer efficient data storage but also come with power-saving features that contribute to a greener lifestyle.
Understanding Energy-Efficient NAS
NAS devices are used to store and manage data on a network. They are commonly used in homes to create a central hub for accessing files, streaming media, and backing up data. Energy-efficient NAS systems are designed with power-saving mechanisms that help minimize energy consumption without compromising performance or functionality.
Power-Saving Features
Hard Drive Spin-Down
A significant portion of the power consumed by NAS devices goes towards spinning the hard drives. Traditional NAS systems keep the hard drives spinning constantly, even when they are not in use, which leads to unnecessary energy usage. Energy-efficient NAS devices, on the other hand, incorporate intelligent power management features that spin down the hard drives when they are idle for a set period of time. This significantly reduces energy consumption and extends the lifespan of the hard drives.
Scheduled Power Management
Another power-saving feature found in energy-efficient NAS devices is the ability to schedule when the device operates. These NAS systems allow users to define specific time periods during which the device is powered on and available for use. During the specified off-hours, the NAS automatically enters a low-power mode, reducing energy consumption when it is not needed.
Wake-on-LAN
The Wake-on-LAN feature enables users to access their NAS devices remotely without having them powered on all the time. With this feature, users can send a signal to the NAS device to wake it up from … Read More